
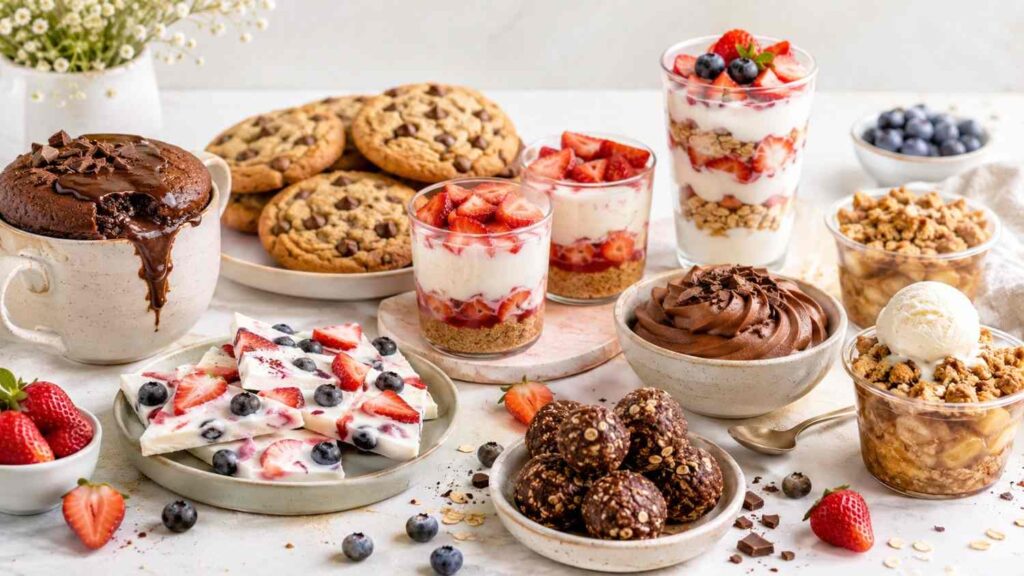
These yummy dessert recipes are designed for the moments when you want something sweet without turning your kitchen into a professional bakery. Some are rich and chocolatey, some are filled with fresh fruit, and others use familiar ingredients such as oats, yogurt, peanut butter, bananas, and apples. You’ll find desserts that can be made in a microwave, an oven, a blender, or simply a mixing bowl.
The collection is also suitable for different schedules. A chocolate mug cake can satisfy a late-night craving in minutes, while cheesecake cups and yogurt bark can be prepared earlier and chilled until needed. The banana cookies and brownie bites work well for lunchboxes, and the parfaits look attractive enough to serve at a casual dinner.
Not every dessert needs to be complicated or perfectly decorated. A good homemade sweet should taste satisfying, fit the occasion, and be achievable with the time and ingredients you have. Think of this list as a dessert toolbox: choose the right tool for the craving in front of you.
You can also customize nearly every recipe. Swap the fruit, change the toppings, adjust the sweetness, or use an appropriate dairy-free alternative. Always check ingredient labels carefully when cooking for someone with allergies, intolerances, or specific dietary needs.
What Makes a Dessert Easy, Quick, or Healthier?
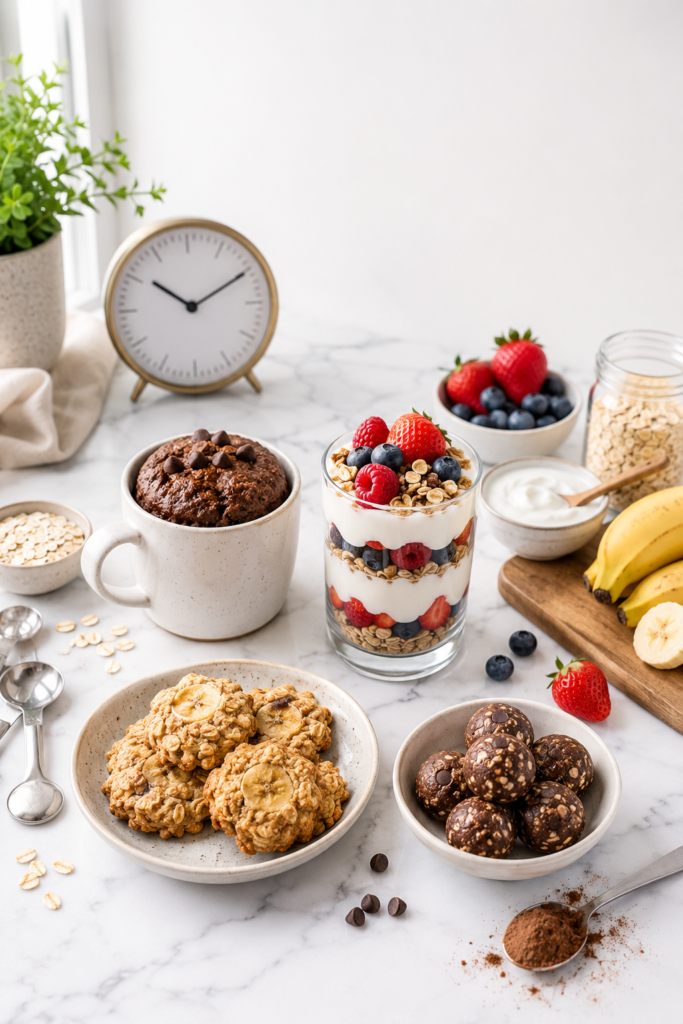
An easy dessert uses familiar techniques and doesn’t demand specialist equipment. Mixing ingredients in one bowl, blending a mousse, or layering a parfait is easier for a beginner than tempering chocolate or making laminated pastry. Easy doesn’t mean boring; it means the instructions are forgiving and the result doesn’t depend on advanced skills.
A quick dessert has limited hands-on preparation. Some recipes may require chilling or freezing, but you won’t need to spend an hour actively measuring, mixing, rolling, and decorating. The mug cake, parfait, and energy bites are especially useful when you need something sweet with minimal work.
The word healthy needs a little more care. A dessert doesn’t become a health food merely because it contains oats, yogurt, fruit, or avocado. However, those ingredients can add flavor, texture, and useful nutrients while helping you rely less heavily on highly processed ingredients. Current dietary guidance emphasizes whole fruits, whole grains, nuts, seeds, dairy, and minimally processed foods while recommending limits on added sugar. on, this collection uses the phrase healthier-style dessert rather than claiming that every recipe suits every diet. Portion size, total eating pattern, personal health needs, allergies, and ingredient choices all matter. Readers managing diabetes, food allergies, digestive conditions, or other medical concerns should follow guidance from a qualified health professional.
One safety rule applies to every baked recipe: don’t taste raw flour-based dough or batter. The FDA and CDC explain that flour is a raw food and that both uncooked flour and raw eggs can contain germs. Bake or cook the mixture according to the directions, and wash hands, utensils, bowls, and work surfaces after handling raw ingredients. mparison of the Ten Desserts.
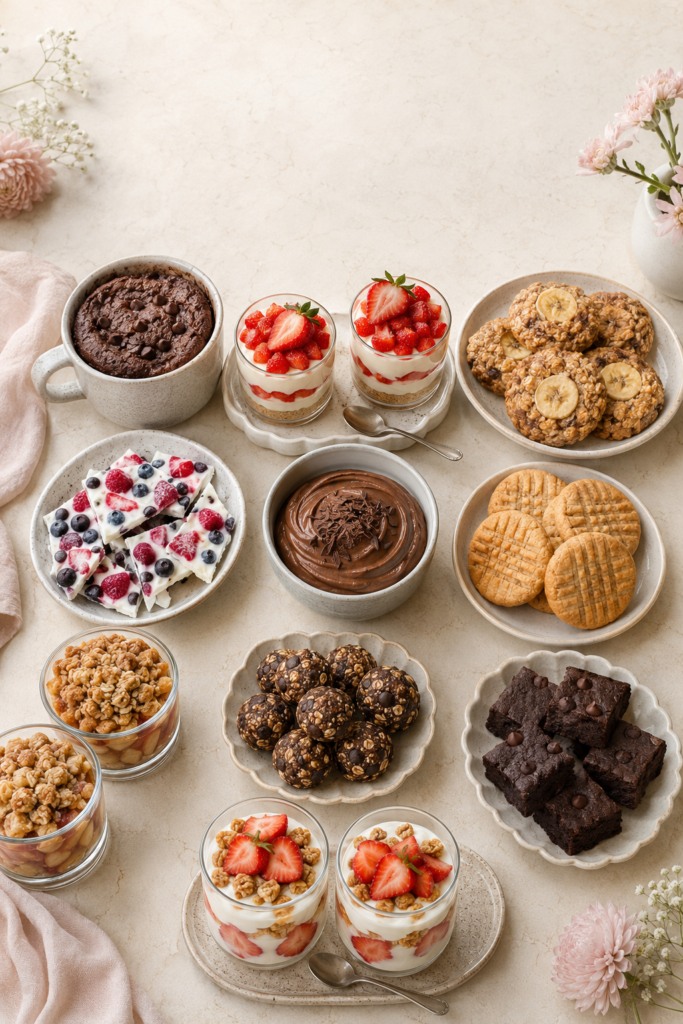
| Dessert | Active Time | Cooking Method | Difficulty | Best For |
| Chocolate mug cake | 5 minutes | Microwave | Very easy | A single warm serving |
| Strawberry cheesecake cups | 15 minutes | No-bake | Easy | Parties and make-ahead desserts |
| Banana oat cookies | 10 minutes | Oven | Easy | Lunchboxes and snack time |
| Greek yogurt berry bark | 10 minutes | Freezer | Very easy | Warm-weather treats |
| Chocolate avocado mousse | 10 minutes | Blender | Very easy | A creamy chocolate craving |
| Peanut butter cookies | 10 minutes | Oven | Easy | Simple cookie baking |
| Apple crisp cups | 15 minutes | Oven | Easy | A warm fruit dessert |
| Chocolate oat energy bites | 15 minutes | No-bake | Very easy | Portable sweet snacks |
| Black bean brownie bites | 15 minutes | Oven | Easy | Fudgy bite-sized treats |
| Strawberry yogurt parfaits | 10 minutes | No-bake | Very easy | Breakfast-style desserts and entertaining |
Times are approximate and may change according to your equipment, ingredient temperature, portion size, and experience.
Warm Chocolate Mug Cake
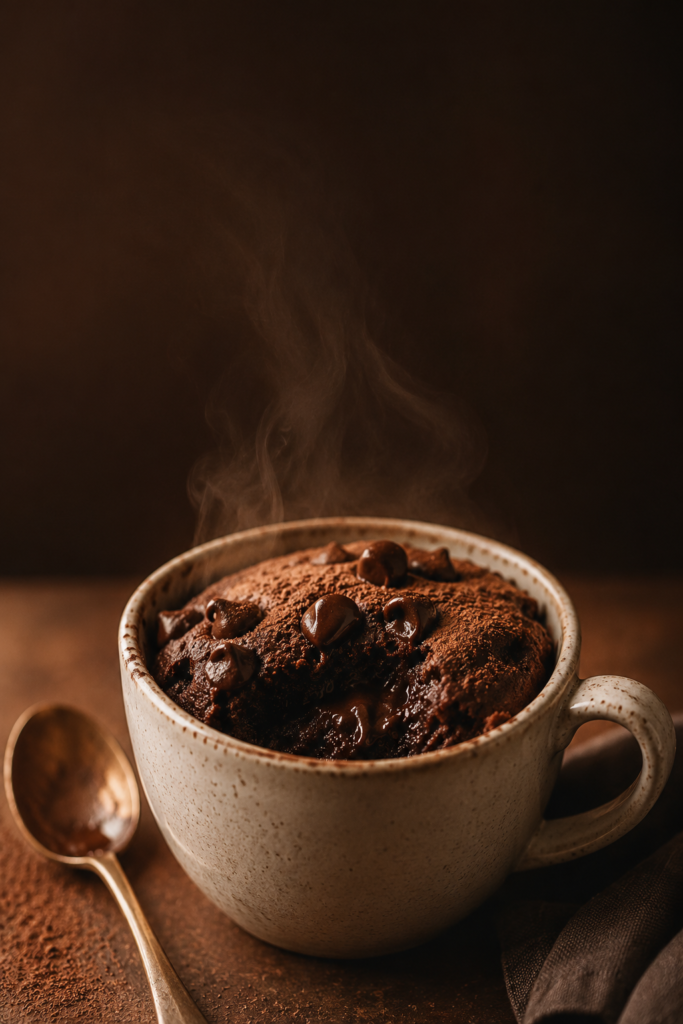
A mug cake is the dessert equivalent of a warm blanket: simple, comforting, and ready when you need it. This version has a soft chocolate center and requires only one mug, which means very little washing up. The most important step is avoiding overcooking because an extra 20 or 30 seconds can turn a tender cake into a dry sponge.
Preparation time: 3 minutes
Cooking time: About 60–90 seconds
Servings: 1
Ingredients
- 4 tablespoons all-purpose flour, about 32 grams
- 2 tablespoons unsweetened cocoa powder
- 2 tablespoons sugar
- ¼ teaspoon baking powder
- A small pinch of salt
- 4 tablespoons milk
- 1 tablespoon neutral oil or melted butter
- ¼ teaspoon vanilla extract
- 1 tablespoon chocolate chips, optional
Method
- Choose a microwave-safe mug with enough empty space for the cake to rise.
- Add the flour, cocoa, sugar, baking powder, and salt. Stir until evenly combined.
- Add the milk, oil, and vanilla. Mix until no dry pockets remain.
- Fold in the chocolate chips.
- Microwave on high for 60 seconds. Continue in 10-second intervals if the center still looks wet.
- Allow the cake to stand for one minute before eating because the mug and cake will be hot.
For a deeper flavor, add a pinch of instant coffee. It won’t necessarily make the cake taste like coffee; instead, it can make the cocoa taste richer. You can also place a teaspoon of peanut butter in the center before cooking.
Microwave power varies, so treat the first cake as a test. The surface should look set, but the inside may remain slightly moist. Never taste the uncooked batter, and make sure the flour-based mixture is properly cooked. Strawberry Cheesecake Cups**
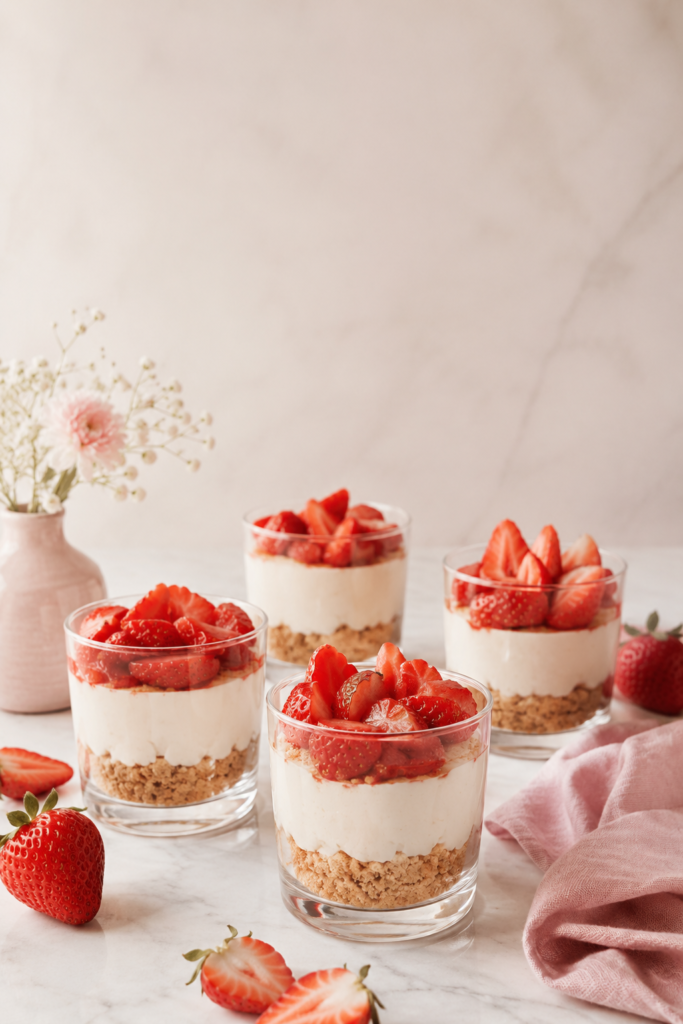
These cheesecake cups look elegant but require no oven, water bath, or springform pan. The filling is smooth, slightly tangy, and balanced by juicy strawberries and a crunchy crumb base. Serving the dessert in individual glasses also removes the stress of cutting neat cheesecake slices.
Preparation time: 15 minutes
Chilling time: 30 minutes or longer
Servings: 4
Ingredients
- 1 cup crushed graham crackers or digestive biscuits
- 2 tablespoons melted butter
- 225 grams or 8 ounces softened cream cheese
- ½ cup plain Greek yogurt
- 3 tablespoons honey or powdered sugar
- 1 teaspoon vanilla extract
- 1 cup chopped strawberries
- Extra strawberries for serving
Method
- Mix the biscuit crumbs with the melted butter.
- Divide the crumb mixture among four small glasses or jars and press it down lightly.
- Beat the cream cheese until smooth.
- Add the yogurt, honey or sugar, and vanilla. Mix until creamy.
- Fold half the chopped strawberries into the filling.
- Spoon the mixture over the crumb bases.
- Top with the remaining strawberries and refrigerate for at least 30 minutes.
For a lighter texture, fold a small amount of whipped cream into the filling. For a stronger cheesecake flavor, use more cream cheese and less yogurt. Raspberries, blueberries, mangoes, and peaches can replace the strawberries when they are in season.
Keep these cups refrigerated because they contain dairy and fresh fruit. They’re ideal for preparing the night before a party, although the crumb layer becomes softer as it sits. Add the final fruit garnish shortly before serving for the freshest appearance.
An internal link to a no-bake dessert collection would fit naturally after this recipe.
Soft Banana Oat Cookies
When ripe bananas are sitting on the counter, these cookies offer a useful alternative to another loaf of banana bread. They’re soft rather than crisp, with a texture somewhere between an oatmeal cookie and a small baked breakfast bite. Bananas provide moisture and sweetness, while oats create structure.
Preparation time: 10 minutes
Baking time: 12–15 minutes
Servings: About 12 cookies
Ingredients
- 2 very ripe medium bananas
- 1½ cups rolled oats
- ½ teaspoon ground cinnamon
- 1 teaspoon vanilla extract
- A pinch of salt
- ¼ cup chocolate chips, raisins, or chopped nuts
- 1 tablespoon maple syrup or honey, optional
Method
- Heat the oven to 180°C or 350°F and line a baking tray.
- Mash the bananas in a bowl until mostly smooth.
- Stir in the oats, cinnamon, vanilla, salt, and optional sweetener.
- Fold in the chocolate chips, raisins, or nuts.
- Leave the mixture for five minutes so the oats can absorb some moisture.
- Scoop small mounds onto the tray and flatten them slightly.
- Bake for 12–15 minutes, until set and lightly golden around the edges.
- Cool on the tray for five minutes before moving.
The ripeness of the bananas changes the result. Deeply spotted bananas create sweeter, softer cookies, while firmer bananas produce less sweetness and may not bind the oats as effectively. If the mixture looks too wet, add another spoonful of oats.
These cookies are useful for beginners because the dough doesn’t need chilling or rolling. They’re also easy to personalize with coconut, pumpkin seeds, chopped dates, or a little cocoa powder. For a gluten-free version, use oats that are specifically labeled gluten-free when medically necessary.
Link the phrase easy homemade cookie recipes to a broader cookie category on your website.
Frozen Greek Yogurt Berry Bark
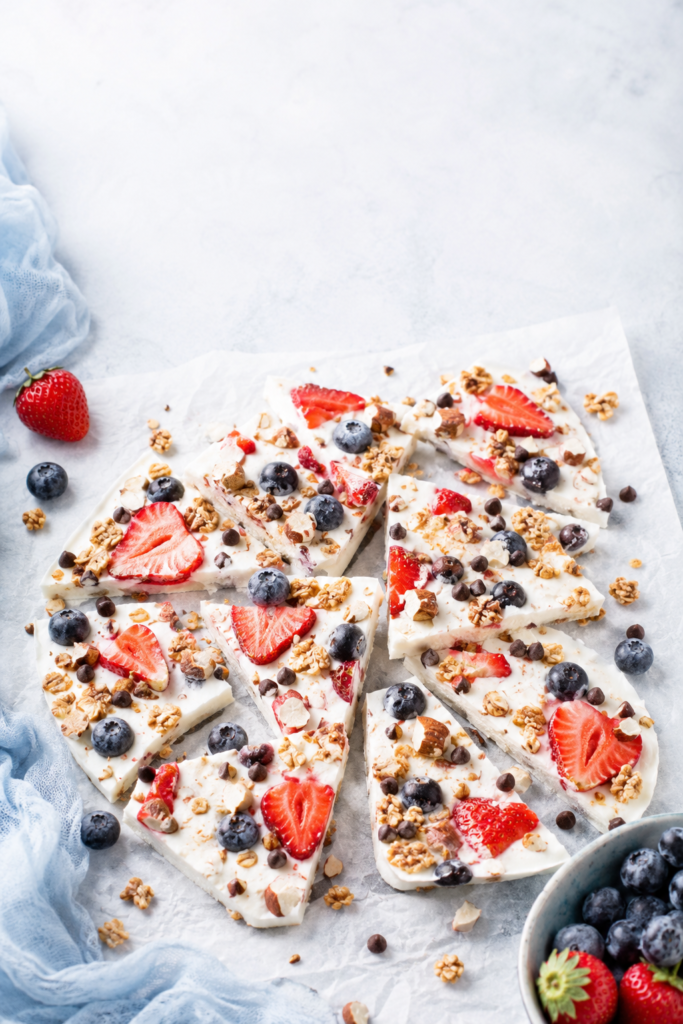
Frozen yogurt bark is colorful, refreshing, and easy enough for children to help assemble with adult supervision. The yogurt becomes firm in the freezer, berries provide bright pockets of flavor, and nuts or granola add crunch. It’s best enjoyed soon after leaving the freezer because it softens as it warms.
Preparation time: 10 minutes
Freezing time: 3–4 hours
Servings: About 8 pieces
Ingredients
- 2 cups thick plain Greek yogurt
- 1–2 tablespoons honey or maple syrup
- 1 teaspoon vanilla extract
- ½ cup sliced strawberries
- ½ cup blueberries
- 2 tablespoons chopped nuts, seeds, or granola
- 1 tablespoon mini chocolate chips, optional
Method
- Line a tray or flat freezer-safe dish with parchment paper.
- Mix the yogurt with the honey and vanilla.
- Spread the yogurt into an even layer about 1 centimetre or ⅓ inch thick.
- Scatter the berries and chosen toppings over the surface.
- Press the toppings gently into the yogurt.
- Freeze until completely firm.
- Break or cut the bark into pieces and return it to the freezer until serving.
Use thick yogurt rather than a thin pouring yogurt. Excess liquid can produce large ice crystals and a less creamy texture. If your berries are very juicy, pat them dry before adding them.
This recipe can be adjusted for the season. Try mango and coconut, peach and cinnamon, or banana and peanut butter. Use dairy-free yogurt when needed, but choose a thick variety and check how firmly it freezes.
Silky Chocolate Avocado Mousse
Avocado may sound unusual in a dessert, but its smooth texture makes it useful in a quick chocolate mousse. Cocoa and vanilla lead the flavor, while the avocado creates the creamy body. The key is using a fully ripe avocado and blending until no green pieces remain.
Preparation time: 10 minutes
Chilling time: 20 minutes, optional
Servings: 2
Ingredients
- 1 large ripe avocado
- 3 tablespoons unsweetened cocoa powder
- 2–3 tablespoons maple syrup or honey
- 3 tablespoons milk or a dairy-free alternative
- ½ teaspoon vanilla extract
- A small pinch of salt
- Berries, coconut, or chopped chocolate for serving
Method
- Place the avocado flesh, cocoa, two tablespoons of sweetener, milk, vanilla, and salt in a blender or food processor.
- Blend until completely smooth, stopping to scrape down the sides.
- Taste and add more sweetener or milk if needed.
- Divide between two small bowls.
- Chill for 20 minutes or serve immediately.
- Add berries, coconut, nuts, or a small amount of chopped chocolate.
The dessert will taste best when the avocado is ripe but fresh, without dark or stringy flesh. Cocoa can taste slightly bitter, so adjust the sweetener gradually instead of adding a large quantity at once. A pinch of salt helps balance the bitterness.
This mousse is rich even though the serving looks small. Use small glasses and add fresh fruit for contrast. You can also blend in a spoonful of peanut or almond butter, provided allergies aren’t a concern.
A natural internal link could point readers to your easy chocolate desserts page.
Three-Ingredient Peanut Butter Cookies
These cookies prove that a short ingredient list can still produce a satisfying result. They have crisp edges, soft centers, and a strong peanut flavor. Because the recipe doesn’t use flour, it’s especially quick to mix, although you must still bake the egg-containing dough completely.
Preparation time: 10 minutes
Baking time: 8–10 minutes
Servings: About 14 cookies
Ingredients
- 1 cup smooth peanut butter
- ½ cup sugar
- 1 large egg
Optional additions
- ½ teaspoon vanilla
- A pinch of salt
- Chocolate chips
- Ground cinnamon
Method
- Heat the oven to 180°C or 350°F and line a baking tray.
- Mix the peanut butter, sugar, and egg until a thick dough forms.
- Scoop small portions onto the tray, leaving space between them.
- Flatten each cookie gently with a fork to create a crosshatch pattern.
- Bake for 8–10 minutes, until the edges appear set.
- Let the cookies cool on the tray for at least 10 minutes before moving them.
The cookies may look very soft when they first leave the oven. Don’t keep baking until they become hard, because they continue to firm as they cool. Moving them too early can cause them to break.
Use regular creamy peanut butter for the most predictable texture. Natural peanut butter can work, but oil separation may make the dough softer or greasier. Stir natural peanut butter thoroughly before measuring it.
Peanuts are a major allergen. Don’t serve these cookies to anyone with a peanut allergy, and avoid cross-contact when cooking for groups. A seed-butter version may be possible, but its texture, sweetness, and baking behavior should be tested separately.
Cinnamon Apple Crisp Cups
Apple crisp delivers the comfort of pie without requiring pastry. Baking it in small dishes creates individual portions with tender fruit underneath and crunchy oat topping above. The smell of apples and cinnamon also makes this recipe feel more complicated than it really is.
Preparation time: 15 minutes
Baking time: 25–30 minutes
Servings: 4
Ingredients
For the apples:
- 3 medium apples, peeled if desired and diced
- 1 tablespoon lemon juice
- 1 tablespoon brown sugar or maple syrup
- 1 teaspoon ground cinnamon
- 1 teaspoon cornstarch
For the topping:
- ½ cup rolled oats
- ¼ cup flour
- 2 tablespoons brown sugar
- ¼ teaspoon cinnamon
- A pinch of salt
- 3 tablespoons melted butter or coconut oil
Method
- Heat the oven to 180°C or 350°F.
- Mix the apples with lemon juice, sweetener, cinnamon, and cornstarch.
- Divide the fruit among four oven-safe ramekins.
- Combine the oats, flour, sugar, cinnamon, salt, and melted butter.
- Sprinkle the topping evenly over the apples.
- Place the ramekins on a baking tray to catch any bubbling juices.
- Bake for 25–30 minutes, until the apples are tender and the topping is golden.
- Cool briefly before serving.
Different apple varieties create different results. A firm, slightly tart apple provides contrast to the sweet topping, while a softer apple breaks down into a more sauce-like filling. A mixture of two varieties can provide both texture and flavor.
Serve the crisp warm with yogurt, whipped cream, custard, or a small scoop of ice cream. Pears can replace some or all of the apples, and chopped nuts can be added to the topping.
No-Bake Chocolate Oat Energy Bites
These chocolate oat bites are portable, quick to prepare, and easy to keep in the refrigerator for a sweet afternoon snack. They taste like a cross between an oatmeal cookie and a soft chocolate truffle. Because they aren’t baked, the texture depends on balancing sticky and dry ingredients.
Preparation time: 15 minutes
Chilling time: 20 minutes
Servings: About 14 bites
Ingredients
- 1 cup rolled oats
- ½ cup peanut butter or almond butter
- ⅓ cup honey or maple syrup
- 2 tablespoons unsweetened cocoa powder
- 2 tablespoons ground flaxseed or chia seeds, optional
- ½ teaspoon vanilla extract
- A pinch of salt
- 2 tablespoons mini chocolate chips or chopped nuts, optional
Method
- Mix the oats, cocoa, seeds, and salt in a bowl.
- Add the nut butter, honey, and vanilla.
- Stir until the mixture holds together.
- Fold in the optional chocolate chips or nuts.
- Refrigerate for 15–20 minutes if the mixture feels too sticky.
- Roll into small balls using clean hands.
- Store in a sealed container in the refrigerator.
If the mixture crumbles, add another teaspoon of nut butter or honey. If it feels too wet, add a spoonful of oats. This simple adjustment is more reliable than following measurements blindly because different nut butters have different consistencies.
For a peanut-free version, use an appropriate seed butter and verify every ingredient label. You can also roll the finished bites in coconut, cocoa, or finely chopped nuts.
These are still sweet, energy-dense bites rather than unlimited snacks. Making them small helps create practical portions. Add an internal link to healthy snack ideas or no-bake snacks after the recipe.
Fudgy Black Bean Brownie Bites
Black beans create moisture and body in these brownie bites without giving the finished dessert a strong bean flavor when the mixture is blended properly. Cocoa, vanilla, and chocolate remain the main flavors. The small size helps the bites bake evenly and makes them convenient for sharing.
Preparation time: 15 minutes
Baking time: 12–15 minutes
Servings: About 18 mini bites
Ingredients
- 1 can black beans, about 400 grams or 15 ounces, drained and rinsed thoroughly
- 2 large eggs
- ⅓ cup maple syrup or sugar
- ¼ cup unsweetened cocoa powder
- 2 tablespoons neutral oil or melted butter
- 1 teaspoon vanilla extract
- ½ teaspoon baking powder
- A pinch of salt
- ¼ cup chocolate chips, optional
Method
- Heat the oven to 180°C or 350°F and grease a mini muffin pan.
- Place the beans, eggs, sweetener, cocoa, oil, vanilla, baking powder, and salt in a food processor.
- Blend until the batter is completely smooth.
- Stir in most of the chocolate chips.
- Divide the mixture among the mini muffin cups.
- Sprinkle the remaining chocolate chips on top.
- Bake for 12–15 minutes, until the tops appear set.
- Cool before removing from the pan.
Rinsing the beans well removes excess canning liquid and helps create a cleaner flavor. Blending is equally important; visible bean pieces will make the texture less brownie-like. A high-speed blender may also work, although you may need to stop and scrape the container several times.
Don’t overbake the bites. They should be set but still moist in the middle. Like many brownies, their texture becomes firmer after cooling.
These bites include beans, but they remain a dessert containing sweetener and chocolate. Present them as an interesting ingredient variation rather than claiming that they replace a balanced meal.
Strawberry Yogurt Parfaits
A parfait is one of the easiest desserts to make look impressive. Clear glasses reveal the layers of creamy yogurt, bright fruit, and crunchy granola. The recipe is flexible enough for breakfast, an afternoon snack, or a light dessert after dinner.
Preparation time: 10 minutes
Cooking time: None
Servings: 4
Ingredients
- 2 cups thick plain or vanilla yogurt
- 2 cups sliced strawberries
- 1 cup granola
- 1–2 tablespoons honey or maple syrup, optional
- ½ teaspoon vanilla extract, optional
- Mint leaves or chopped nuts for serving
Method
- Mix plain yogurt with honey and vanilla if additional sweetness is desired.
- Place a spoonful of yogurt in each glass.
- Add a layer of strawberries.
- Sprinkle in a layer of granola.
- Repeat the layers until the glasses are filled.
- Garnish and serve immediately.
For the best crunch, assemble the parfaits shortly before serving. If they must be prepared earlier, layer only the yogurt and fruit, refrigerate them, and add the granola at the last minute.
Use seasonal fruit whenever possible. Blueberries, peaches, mangoes, cherries, bananas, and raspberries all work well. Frozen fruit can also be used after thawing, although it may release extra liquid.
When using flavored yogurt and sweetened granola, taste the components before adding honey. You may find that no additional sweetener is needed.
How to Choose the Right Dessert for Your Mood
When you want a warm dessert immediately, choose the chocolate mug cake. It requires only one serving dish and delivers the quickest path from craving to dessert. The apple crisp is another warm choice, but it works better when you have more time and want several portions.
For a hot day, select the Greek yogurt bark, cheesecake cups, chocolate mousse, or parfaits. These cold desserts feel refreshing and can be prepared without heating the kitchen. The cheesecake cups are best for guests, while yogurt bark is more casual and playful.
Choose the banana oat cookies when you have ripe bananas to use. Select the peanut butter cookies when your pantry is almost empty but contains peanut butter, sugar, and an egg. The oat energy bites work well when you need a portable option that doesn’t require baking.
Chocolate lovers have several choices. The mug cake offers a warm, soft texture; the avocado mousse is cold and creamy; the energy bites are chewy; and the black bean brownies are fudgy. Choosing by texture is often easier than choosing by ingredient.
For a fruit-first dessert, make the strawberry parfaits, cheesecake cups, apple crisp, or berry bark. Using seasonal fruit can also improve flavor and reduce the need for extra sweetness.
Smart Ingredient Swaps and Variations
A successful substitution should replace the original ingredient’s function, not merely its appearance. Butter, for example, adds fat, flavor, moisture, and tenderness. Replacing it with a completely different ingredient may alter several parts of the recipe at once.
Use the following swaps as starting points rather than guarantees:
| Original Ingredient | Possible Alternative | Important Note |
| Dairy milk | Oat, soy, or almond drink | Texture and flavor may change. |
| Greek yogurt | Thick dairy-free yogurt | Choose a variety that isn’t watery. |
| Butter | Coconut oil or neutral oil | Flavor and firmness will differ. |
| Peanut butter | Almond or seed butter | Check allergy requirements and texture. |
| Strawberries | Raspberries, blueberries, mangoes, or peaches | Adjust sweetness according to the fruit. |
| Chocolate chips | Chopped chocolate, raisins, nuts, or coconut | Melting and sweetness will vary. |
| Honey | Maple syrup | The mixture may become slightly thinner. |
| All-purpose flour | Tested gluten-free flour blend | A one-to-one blend is more predictable than a single alternative flour. |
When reducing sugar, start with a modest change. Sugar affects more than sweetness in baked goods; it can influence browning, moisture, spreading, and texture. A drastic reduction may create a dry cake or dense cookie even when the flavor seems acceptable.
Spices are one of the easiest ways to change flavor without disrupting structure. Cinnamon suits apples, bananas, oats, and chocolate. Cardamom works well with berries and yogurt, while orange zest can brighten chocolate desserts.
An internal link to a baking substitutions guide would be useful in this section.
Common Dessert Mistakes to Avoid
Overmixing flour-based batter can create a firmer, tougher texture. Once flour is added, mix only until the dry streaks disappear unless the recipe specifically says otherwise. The mug cake especially needs only a brief stir.
Overbaking is another common problem. Cookies, brownies, and cakes continue to set as they cool. Waiting until every part looks completely dry may produce a hard or crumbly dessert.
Ignoring ingredient temperature can affect creamy recipes. Cold cream cheese may remain lumpy, while very warm yogurt can become loose. Let cream cheese soften before mixing, but return perishable ingredients to the refrigerator promptly.
Making uncontrolled substitutions can also cause disappointment. Changing the flour, fat, sweetener, and egg simultaneously turns a tested recipe into an experiment. Make one meaningful change at a time and record what happened.
Tasting raw dough or batter is not a safe way to check sweetness. Flour and raw eggs can contain germs, and grinding or bleaching flour doesn’t reliably kill them. Follow the stated cooking directions and clean surfaces after handling raw baking ingredients. chy toppings too early** can ruin their texture. Granola, chopped nuts, and cookie crumbs soften when they sit against yogurt or moist fruit. Add them shortly before serving whenever crunch matters.
Storage and Make-Ahead Guide
Proper storage protects both the flavor and quality of homemade desserts. Use clean, covered containers, refrigerate recipes containing dairy, eggs, cut fruit, or other perishable ingredients, and label prepared food when making several recipes at once.
| Dessert | Recommended Storage Approach | Quality Note |
| Mug cake | Best eaten immediately | It becomes firmer as it cools. |
| Cheesecake cups | Refrigerate, covered | Add fresh garnish before serving. |
| Banana oat cookies | Store in a covered container; refrigerate for longer freshness | Their soft texture becomes moister over time. |
| Yogurt bark | Keep frozen in a sealed container | Serve directly from the freezer. |
| Avocado mousse | Refrigerate tightly covered | Best when freshly prepared. |
| Peanut butter cookies | Store in an airtight container | Cool completely before covering. |
| Apple crisp cups | Refrigerate after cooling | Reheat gently if a warm serving is preferred. |
| Energy bites | Refrigerate in a sealed container | Separate layers with parchment if sticky. |
| Brownie bites | Refrigerate for longer storage | Allow them to cool fully first. |
| Parfaits | Refrigerate yogurt and fruit layers | Add granola immediately before serving. |
As a conservative general rule, USDA guidance recommends using most refrigerated cooked leftovers within three to four days. Exact storage life can vary by recipe, ingredient, refrigerator temperature, handling, and local food-safety guidance. When in doubt, consult the USDA FoodKeeper resource and discard food that shows signs of spoilage or has been stored improperly. large amount of hot dessert directly into a deep sealed container. Allow it to stop steaming, divide it into smaller portions when appropriate, and refrigerate promptly. Don’t leave perishable dairy- or egg-based desserts sitting at room temperature for extended periods.
Final Thoughts
The best dessert isn’t always the most complicated one. It’s the recipe that fits your craving, ingredients, available time, and confidence in the kitchen. A five-minute mug cake can be just as satisfying on a quiet evening as a carefully layered cheesecake cup can be at a party.
These ten yummy dessert recipes give you several directions to explore. Start with the three-ingredient peanut butter cookies when you want simplicity, the parfaits when you want fresh fruit, or the brownie bites when only a deep chocolate flavor will do. Once you understand the basic method, adjust toppings and flavors to make each recipe your own.
Remember that “healthier” is not an all-or-nothing label. Fruit, oats, yogurt, nuts, seeds, beans, and avocado can add variety and substance, while thoughtful portions and moderate sweetness help keep dessert enjoyable. Dessert should be part of real life, not a source of unnecessary pressure.
Frequently Asked Questions
What is the easiest dessert for a complete beginner?
The strawberry yogurt parfait is the easiest because it requires no cooking, baking, or special equipment. You simply layer yogurt, fruit, and granola. The chocolate oat bites and cheesecake cups are also beginner-friendly.
What dessert can I make in less than ten minutes?
A chocolate mug cake, strawberry parfait, or chocolate avocado mousse can be prepared in about ten minutes. The mug cake is the quickest option when you want a warm dessert.
Can I make these desserts without an oven?
Yes. The cheesecake cups, yogurt bark, avocado mousse, energy bites, and parfaits don’t require an oven. The mug cake uses a microwave.
Which dessert is best for children to help prepare?
Children can help layer parfaits, spread yogurt bark, mash bananas, or roll energy bites with appropriate adult supervision. Adults should manage ovens, microwaves, sharp tools, and food-safety procedures.
How can I make a dessert less sweet?
Reduce optional sweeteners, use plain yogurt, choose naturally sweet ripe fruit, and avoid combining several sweetened components. In baked recipes, reduce sugar gradually because sugar also affects texture, moisture, and browning.
Final Custom Message:
Save this collection for the next time a sweet craving appears, and begin with the recipe that matches the ingredients already in your kitchen. Which dessert will earn the first place in your personal recipe box?